August 8, 2010
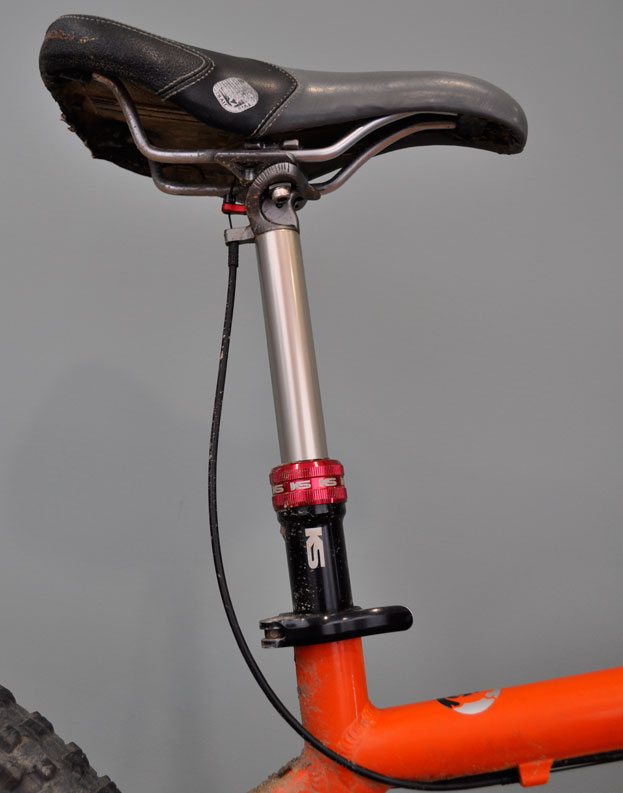
If you’re an all-mountain rider, chances are you find yourself changing your seatpost height multiple times during a ride. Frankly, it’s a pain in the ass. You have to get off your damn bike, open your seat post clamp, guess at what height will work for the section of trail ahead, and re-tighten the clamp. If you guessed wrong at the height, chances are you just ride it that way. You might even leave it there for longer than it’s comfortable just for the sake of not getting off again. The cycling industry has answered this dilemma by creating posts that allow riders to remotely raise and lower their seats, on demand, as trail conditions dictate. Word.
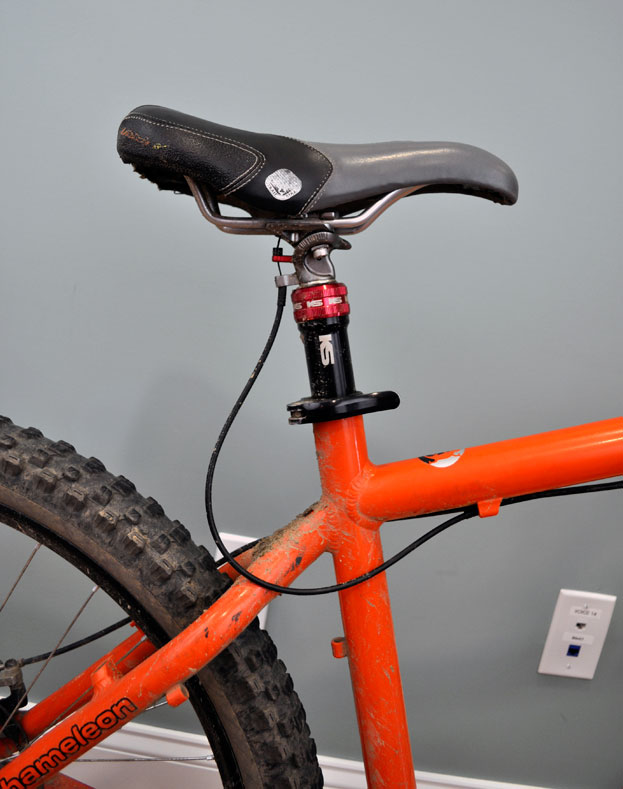
There are lots on the market. Far fewer if you ride a frame that requires a 27.2 post diameter. But if you’re in the more common post diameter of 30.9mm or 31.6mm, there are a bunch of adjustable seat posts to choose from. The issue with so many of these choices, however, is that some posts work differently than others. Many develop millimeters of side-to-side play over time. Some release from their lowered positions when the bike is picked up from the saddle. Some are just plain fuckin’ ugly. And others do not allow the post to insert 100% of the way into the tube. The post I’m reviewing today has no side-to-side play, allows you to pick it up buy the saddle without changing position, offers variable positions within its travel, and can be slammed to max insertion into the frame.
SNAPSHOT
…..Color Avail. – Black Post, Tan Stanchion, Red Ano. Remote /Collar/Rear Lever
…..Operation – Hydraulic w/ Handlebar Mounted Remote
…..Seat Clamp – Set Back (the KS i900 offers no set back)
…..Sizes – 30.9mm (reviewed), 31.6mm
…..Length of Time Used – 2 months & one 27 mile race
…..Price Paid – $229 at PricePoint.com
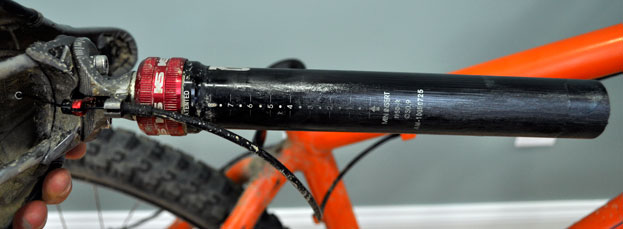
Couldn’t be easier. Remove your old post, swap seats, insert new post to desired height. The measuring units on the back of the post make it a snap to get it right back to where you had it when you need to remove it for cleaning. To determine the max height, you simply extend the post all the way and clamp the base in the seat tube at the highest possible point. This model post can be adjusted 5″ inches in total and at any spot in the travel – there are no preset positions. So after adjusting the post in the highest possible position, you’re left with a wide range of lower position options.

The cable and housing used (which comes with post) is standard shift cable. If you have free cable guides, you can cut and install the cable just like a derailleur cable would run. In my case, I run a 1×9 set up and had free cable guides being that I have no front derailleur. If you go this route, make sure you measure your last run of housing long enough to accommodate the post in its highest possible position.
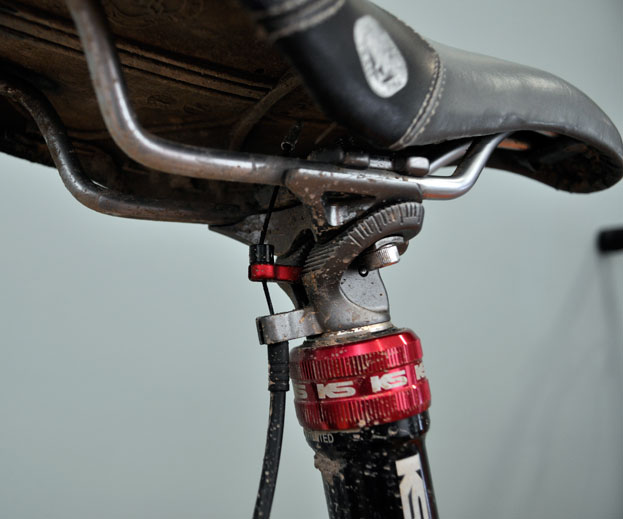
As seen in the photo above, the cable is locked behind the red lever by a collar containing a small allen screw inside. I was careful not to over tighten the tiny allen screw as I got the impression it might strip making reuse difficult. I also pulled the red lever seen in the photo above down slightly as to take out the slack in the actuation thereby making the remote more immediately sensitive. There is a barrel adjuster on the remote for this, but I expect the cable to stretch over time so I plan on using the barrel adjuster at that time. After a few rides, this actuating lever did get a bit sticky (perhaps from mud) but it was fine after a little drop of Tri-Flow.
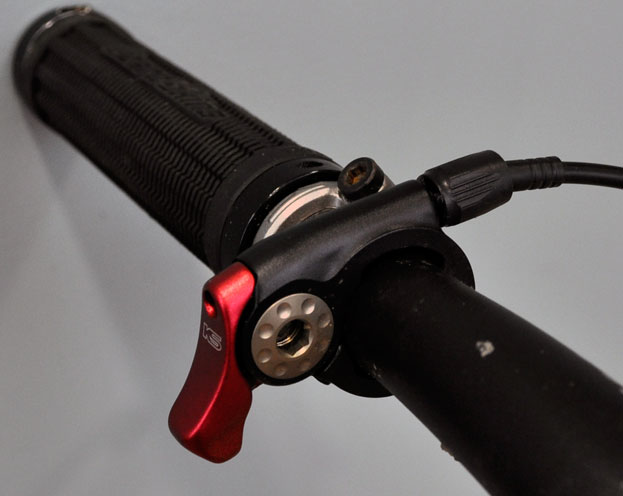
I mounted my remote as the first item after the left grip — close enough for my thumb to reach it much like a trigger shifter. The remote comes with a metal housing for the cable to run through. The metal housing is designed to run right into the remote’s barrel adjuster in place of a housing end cap but I tossed this hunk of crap as it wasn’t needed in any way and made the run of the cable look like ass. Furthermore, the metal housing could get damaged in a crash rendering the remote ineffective. I’ve had zero problems with the remote’s housing set up the way I have it.
To ensure good operation, I did check the tension on the remote lever via the allen screw seen in the photo above. This is a really decent remote in my opinion. It is all metal. To further ensure it would not stick, I hit it with a drop a Tri-Flow.
I’m able to adjust the post on-the-fly even while going downhill. That surprised me and was a huge perk to using the remote version of this post (as opposed to the lever under the seat version). When siting on the post, all you need to do is remove the bulk of your weight, hit the remote, and the seat immediately extends to where your rear end is. If you extend it too far, all you need to do is put your weight on it and squeeze the remote trigger. Simply let go of the trigger when you find the position you want. With the post in the highest possible position, you’re in optimum cross country mode. At half way down, you’re in optimum all-mountain mode. Slam it completely, and you’re ready to shred downhill.
To date, this thing has been reliable as all hell. I can pick the bike up by the seat – hard – and the post stays where it is set. When I store the bike, I make sure to keep the post fully extended. Something in my gut says this might be best for the seals as it keeps them under the least amount of long term pressure. When I am done riding, I make sure to wipe the dirt from around the seals, just like you would on your suspension fork and rear shock. The only time the post extended unwillingly was when I got pissed by getting stumped on a tough climb. I picked the bike up by the seat and spun it wildly as if to throw it. The centrifugal force I created made the post extend. Aside from that, this post has no side-to-side play and has remained 100% reliable under some pretty extreme conditions. I even competed in the Fair Hill Classic in a 27 mile single speed race where I literally changed the position of the post over 100 times. Solid.
This thing is money. I feel like I have three different bikes on the trail and which one I need is up to me and how I feel. Being able to adjust my position for the upcoming terrain is the only way to ride. Not to mention, if you suffer from a soar back on extended rides, I’ve noticed that being able to change seat positions lessens the localized tension your back experiences. I do not want to ride any of my other bikes until I put drop posts on them. All this said, the only hesitation anyone should have in making this upgrade is reliability of the post they choose. That said, I would recommend the Kind Shock i950-R to anyone looking to get a drop post. It’s simply a great product. It even comes with a booklet that explains how to completely break it down for self-service. To date, this is the greatest upgrade I have bought, the best money I have ever spent on my bike and I have no idea why I waited so long.
It would be great if Kind Shock offered this post in various anodized colors. That’s it. That’s all I have to complain about on this one. This drop post is awesome. Can’t wait for the 27.2 version so I can outfit my Ellsworth Moment.
To read reviews of all the options in adjustable seat posts available, check out this threat at MTBR.com.
Thanks for this excellent review: I have one and can’t wait to fit it to my Trek Remedy. Will convert to remote cable control once kit has arrived.
Right on. You’re going to be pleased, I’m sure. Demo’ed a Remedy at Interbike this year. Great all mountain bike!
Hi. I use a 350mm size post on both my bikes. What size length do I need?
Thanks for the review, i can’t wait to get mine. I have a Gary Fisher Hi-Fi carbon and there is no cable guides on it that i can use to fasten cable along the top tube. I may have to use tape to fasten cable to frame. Any suggestions.
You bet. Suggestions: Run 1×9 and you’ll have routing : ) Otherwise, you can try stick-on cable guides. They use 3M tape and are supposed to stick well but I have never tried them. Jagwire makes em. Here is a link.
Hello, great reveiw…I want one! I have a 2003 Rocky Mountain, however the seat post diameter is 26.8 MM. What are my options?
Thank you
PS We are talking about the i950-R from Kind Shock
Thanks. No options on the market below 27.2…..
Hi, thanks for the great review. Could you tell me what the total length of the base is, and what the minimum length insertion is. I only have 6″ available on my frame.
Thanks for the help.
You’re welcome, Craig. Measuring this thing is not something I can right now as removing it from the frame requires the cable to be removed. Too much work. Sorry man. You should be fine with 6″. I believe min insert is around 5″. I would pull the trigger if I was you.
Thanks for the review. I just got one but cable feels snug at The red lever which appears to have a pull that allows air to push post up. How can I loosen the cable locked onto red lever? Want to loosen cable a bit to have a little play.
Hi James. You can loosen that cable two ways- 1. Using the supplied barrel adjuster at the switch. If you do not have a barrel adjuster, there is a cable stop secured by a tiny allen key. Check the manual for more detail. Good luck.
Hi James. You can loosen that cable two ways- 1. Using the supplied barrel adjuster at the switch. 2. If you do not have a barrel adjuster, there is a cable stop secured by a tiny allen key. Check the manual for more detail. Good luck.
Do you know the minimum saddle height one would need to use this post? Like if you post was as low as it can go in the seat tube, what’s the distance between the seat collar and the saddle rails? Thanks!
Would have to measure this and it may be different on the 27.2 version than it is on the others. Why does it matter?
Just checking to see if I have enough seat post showing to be able to run it at full extension. Mine measures about 8.75″ from the collar to the rails so it seems like I will have enough.